Canvas priming mistakes that ruin oil paintings
Oil paint on raw canvas is not a shortcut to a more absorbent surface. It is a direct route for the fabric to absorb the paint’s oil binder.
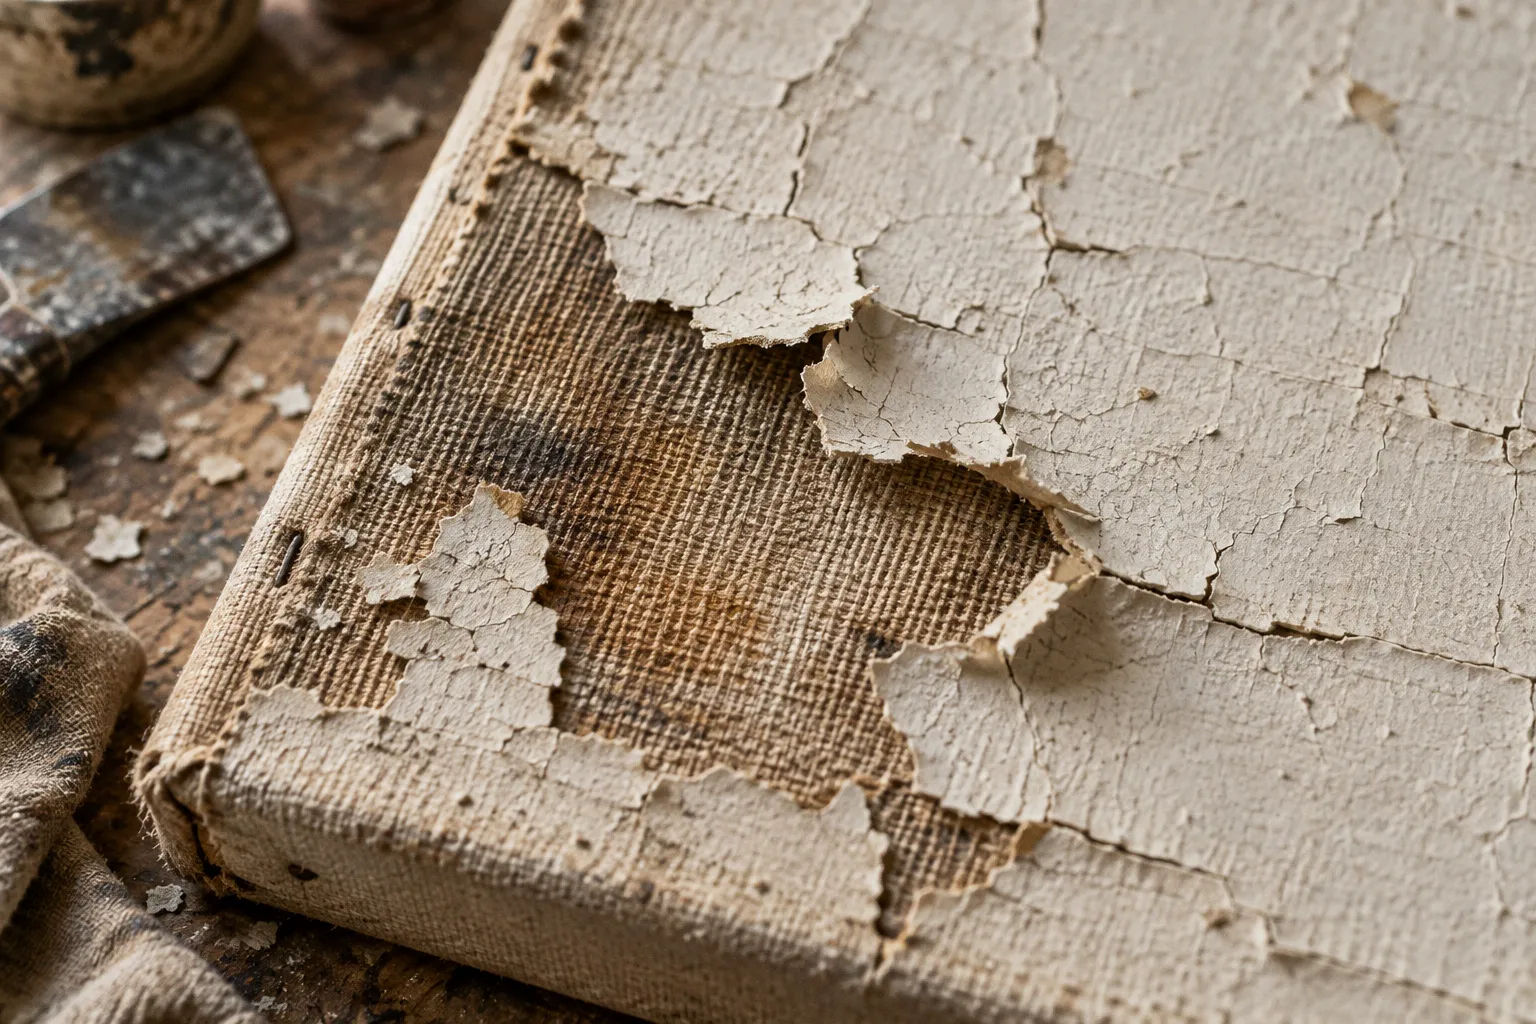
The result can be a dull, sunken paint layer; over time, oil in contact with untreated fibers can also contribute to their deterioration. The damage is not always obvious while the painting is wet. That is what makes this one of the more consequential oil painting canvas priming mistakes.
A sound preparation system has two jobs: isolate the fabric from the oil and provide a stable surface for paint adhesion. Sizing and priming are not interchangeable steps, and neither is made more reliable by applying one heavy coat. I treat canvas preparation as a sequence of layers with separate functions, drying windows, and failure points—not as a cosmetic finish.
Raw canvas is not a neutral surface
Unprimed cotton or linen is absorbent. When oil paint is applied directly, the fabric can draw oil out of the paint film. Pigment remains, but the reduced binder can leave the paint looking dull and uneven. This is commonly described as sinking in.
The immediate appearance is only part of the problem. Oil in direct contact with raw fabric can contribute to fiber deterioration over time. The precise threshold at which damage occurs is not universal, and I would not use a guessed timeline or chemical cutoff to judge safety. The practical decision is simpler: do not leave raw canvas exposed beneath an oil painting.
A prepared support needs a barrier between the fibers and the oil-bearing paint. Sizing performs that isolation function; a ground, such as gesso or an oil primer, then establishes the painting surface. Product instructions matter because materials vary, but the working logic remains consistent: protect the fabric first, then build a suitable ground.
This is where archival canvas sizing issues often begin. “Primed” on a label does not tell you exactly what the surface contains or whether it is appropriate for the process you intend to use. Check whether the canvas is sized, what ground is present, and whether the manufacturer specifies compatibility with oil paint. If the support is raw, a coat of paint is not a substitute for proper preparation.
Oil paint needs a prepared barrier, not just a fabric surface that happens to feel dry.
Thick coats do not save time
For oil painting, a surface commonly takes two to four coats of gesso or primer to establish a protective barrier and a usable tooth. The number is not a mandate to apply four coats to every support. It is a realistic range for building the ground in controlled layers rather than relying on one thick application.
A heavy coat may appear efficient. It also dries unevenly and is more prone to cracking as it contracts. That crack risk is a structural issue, not merely a surface blemish: a brittle or fractured ground compromises the layer above it.
For acrylic gesso, the practical sequence is:
1. Apply a thin, even coat. Avoid ridges, pooled material, and bare areas.
2. Let it dry for about one to two hours before adding the next coat. The actual interval can vary by product and working conditions, so the container’s instructions take precedence.
3. Add further thin coats as needed to cover the weave and establish the desired surface.
4. Allow the final coat to dry for at least 24 hours before applying oil paint.
The aim is not maximum thickness. It is continuous coverage with a stable bond. If the weave remains visible, that may be a deliberate surface choice; it does not automatically mean the ground has failed. If the fabric is still exposed, coverage is incomplete.
Common canvas preparation errors tend to cluster around the same shortcuts:
- One thick coat instead of several thin ones. This increases the chance of cracking during drying.
- Painting before the final coat is dry. A surface that feels dry at a glance is not a reason to ignore the minimum drying window.
- Treating texture as proof of protection. Visible tooth and adequate isolation are separate questions.
- Assuming more primer fixes every defect. Extra material cannot reliably correct an incompatible layer or a poorly prepared support.
Keep acrylic and oil grounds in their lanes
Acrylic gesso is water-based. Adding oil paint to tint it interferes with the acrylic ground’s proper curing. If the objective is a colored ground, use a compatible product or a method specified by the manufacturer; do not improvise by mixing oil paint directly into acrylic gesso.
The reverse layering problem is just as clear. Traditional oil gesso or oil primers require an oil-sized or glue-sized support. They are not suitable surfaces for adding a water-based acrylic primer layer on top. Putting incompatible systems in the wrong order can undermine adhesion before the painting itself begins.
A useful compatibility check is to identify the ground already on the support and the next material in the sequence. “Acrylic” and “oil” are not decorative labels here; they describe different binder systems with different requirements. If the substrate is unknown—especially on a pre-primed canvas—do not assume that a new layer will bond simply because it spreads evenly.
| Existing or planned surface | Practical implication |
|---|---|
| Raw canvas | Do not apply oil paint directly. Establish a suitable sized and primed surface. |
| Acrylic gesso | Do not tint by mixing in oil paint. Let the ground cure according to its instructions. |
| Traditional oil primer | Use an appropriately oil-sized or glue-sized support; do not cover it with water-based acrylic primer. |
| Unknown pre-primed canvas | Identify the existing ground or follow the manufacturer’s compatibility guidance before adding another system. |
This is the part of an oil painting surface preparation guide where marketing language is least useful. Claims about a universal ground or a one-step solution do not replace the actual layer sequence. Compatibility is binary at the level that matters: either the planned materials are intended to work together, or the preparation is an experiment with the painting’s adhesion.
Drying time is part of the structure
Drying is not dead time to be optimized away. It is one of the controls that makes the next layer predictable. Acrylic gesso coats generally need about one to two hours between applications, while the completed surface should have at least 24 hours before oil paint goes on. Follow the product directions if they require longer.
Traditional oil primers have a different schedule. They may need up to a week to cure. Applying paint sooner because the surface appears touch-dry is a poor trade: a faster start has little value if the ground is not ready to receive the paint film.
The relevant distinction is between “dry enough to handle” and “ready for the next material.” Those are not necessarily the same condition. A rushed layer can trap a weakness beneath the paint, where later correction is difficult and expensive in studio time.
For a practical schedule, plan backward from the painting session:
- With acrylic gesso, leave the required interval between coats and at least 24 hours after the final coat before oil painting.
- With a traditional oil primer, allow for a cure that may extend to a week.
- If the product instructions specify a longer wait, use that interval rather than a generic rule.
These are working windows, not guarantees that every brand, film thickness, room, or support will behave identically. The grounded response to that variation is to follow the product’s instructions and avoid making the coating thicker than necessary.
Sanding controls tooth, not compatibility
Sanding between coats can help even the surface and adjust its tooth. It does not repair raw-fabric exposure, make an incompatible ground compatible, or convert a thick, cracked layer into a sound one. Treat it as a surface adjustment after the ground has dried—not as a substitute for sizing or correct layering.
There is no single sandpaper grit that can be prescribed across all gesso brands and supports. Product behavior differs, and a universal number would imply a precision the available information does not support. Work conservatively: remove raised marks without cutting through the ground, then clear the dust before applying another coat or beginning to paint.
The target surface depends on the painting method. A pronounced weave can remain useful for some approaches; a smoother surface may be preferable where small, controlled marks matter. But sanding should be driven by that functional target, not by the assumption that smoother always means better. Each pass removes material. If you expose the canvas, you have reduced the protective layer and need to restore it.
That distinction matters in both alla prima work and layered painting. A surface with adequate tooth helps the paint engage mechanically. A surface that is too slick may not behave as expected; a surface that is uneven or fractured introduces defects unrelated to brushwork. The preparation should support the intended handling without sacrificing the barrier beneath it.
A reliable sequence, with fewer assumptions
For a new canvas intended for oil painting, the decision path is straightforward:
1. Identify the support. Determine whether it is raw, sized, or already primed. Do not treat those states as equivalent.
2. Establish fiber protection. If the canvas is raw, use an appropriate sizing and ground system rather than relying on the first oil-paint layer to seal it.
3. Confirm material compatibility. Keep acrylic gesso, oil primer, and sizing in an order designed for those materials. Do not mix oil paint into acrylic gesso.
4. Build the ground in thin coats. Two to four coats is a common range for an oil painting surface; coverage and product instructions determine where within that range the support belongs.
5. Allow each layer to dry. Use the stated intervals. For acrylic gesso, that generally means one to two hours between coats and at least 24 hours after the final coat; traditional oil primers may take up to a week.
6. Adjust the tooth only after the ground is sound. Sand lightly if the surface needs it, and avoid cutting through the protective layer.
This process does not guarantee that a painting will remain unchanged indefinitely. Materials, storage, handling, and later conservation all affect longevity. It does remove several avoidable failures from the support stage: direct oil absorption by raw fabric, cracking from an overbuilt coat, and adhesion problems caused by an incompatible layer sequence.
The cheapest priming step is the one that prevents a support failure you cannot fix from the front.
My verdict is unambiguous: do not economize by painting on raw canvas, piling on one thick coat, or shortening the cure because the surface looks ready. A few thin, compatible layers and the correct drying intervals cost more calendar time than a shortcut. They cost less than rebuilding a compromised painting.